Quick Configuration & Sync
After installing BookmarkHub, follow these steps to configure your cloud storage and experience your first sync.
1. Setup GitHub Gist Information in the Extension
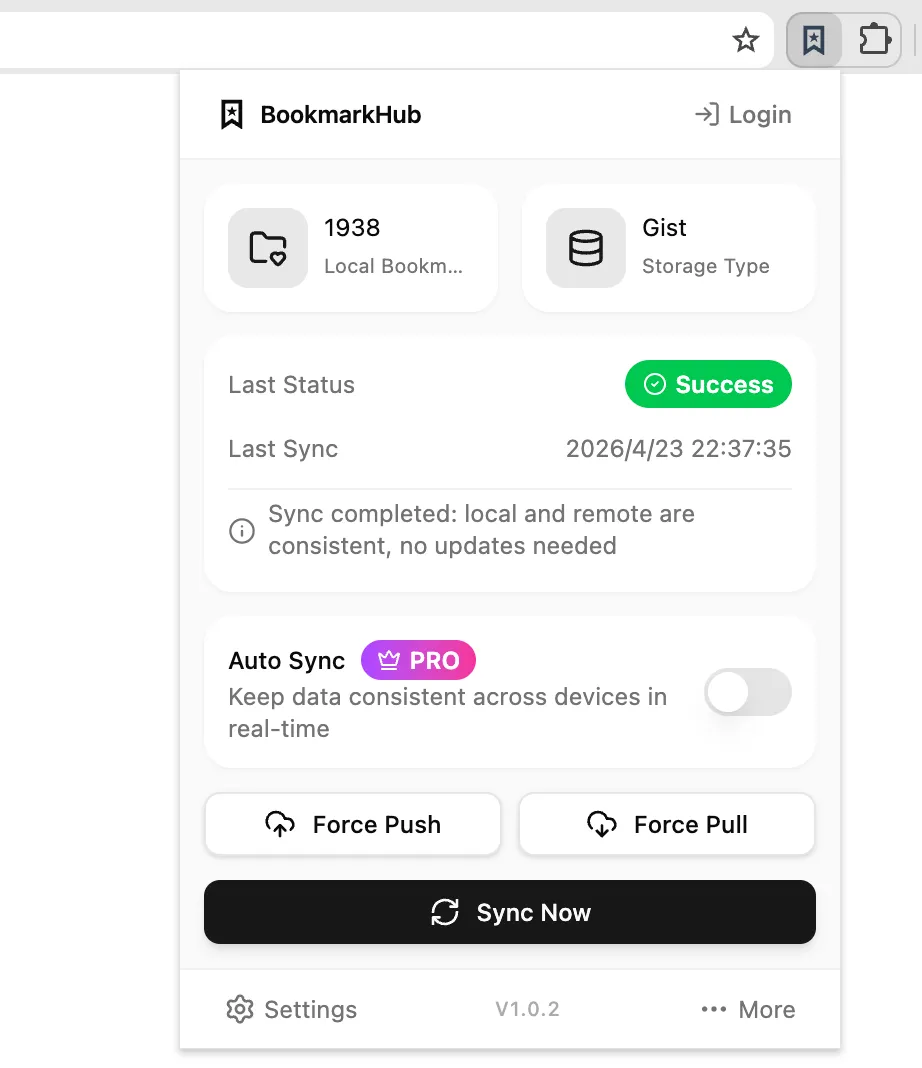
Section titled “1. Setup GitHub Gist Information in the Extension”- Click the BookmarkHub icon in the top right corner of your browser to expand the main panel.
- Click the settings icon (Gear Icon) in the bottom left to enter the extension settings page.
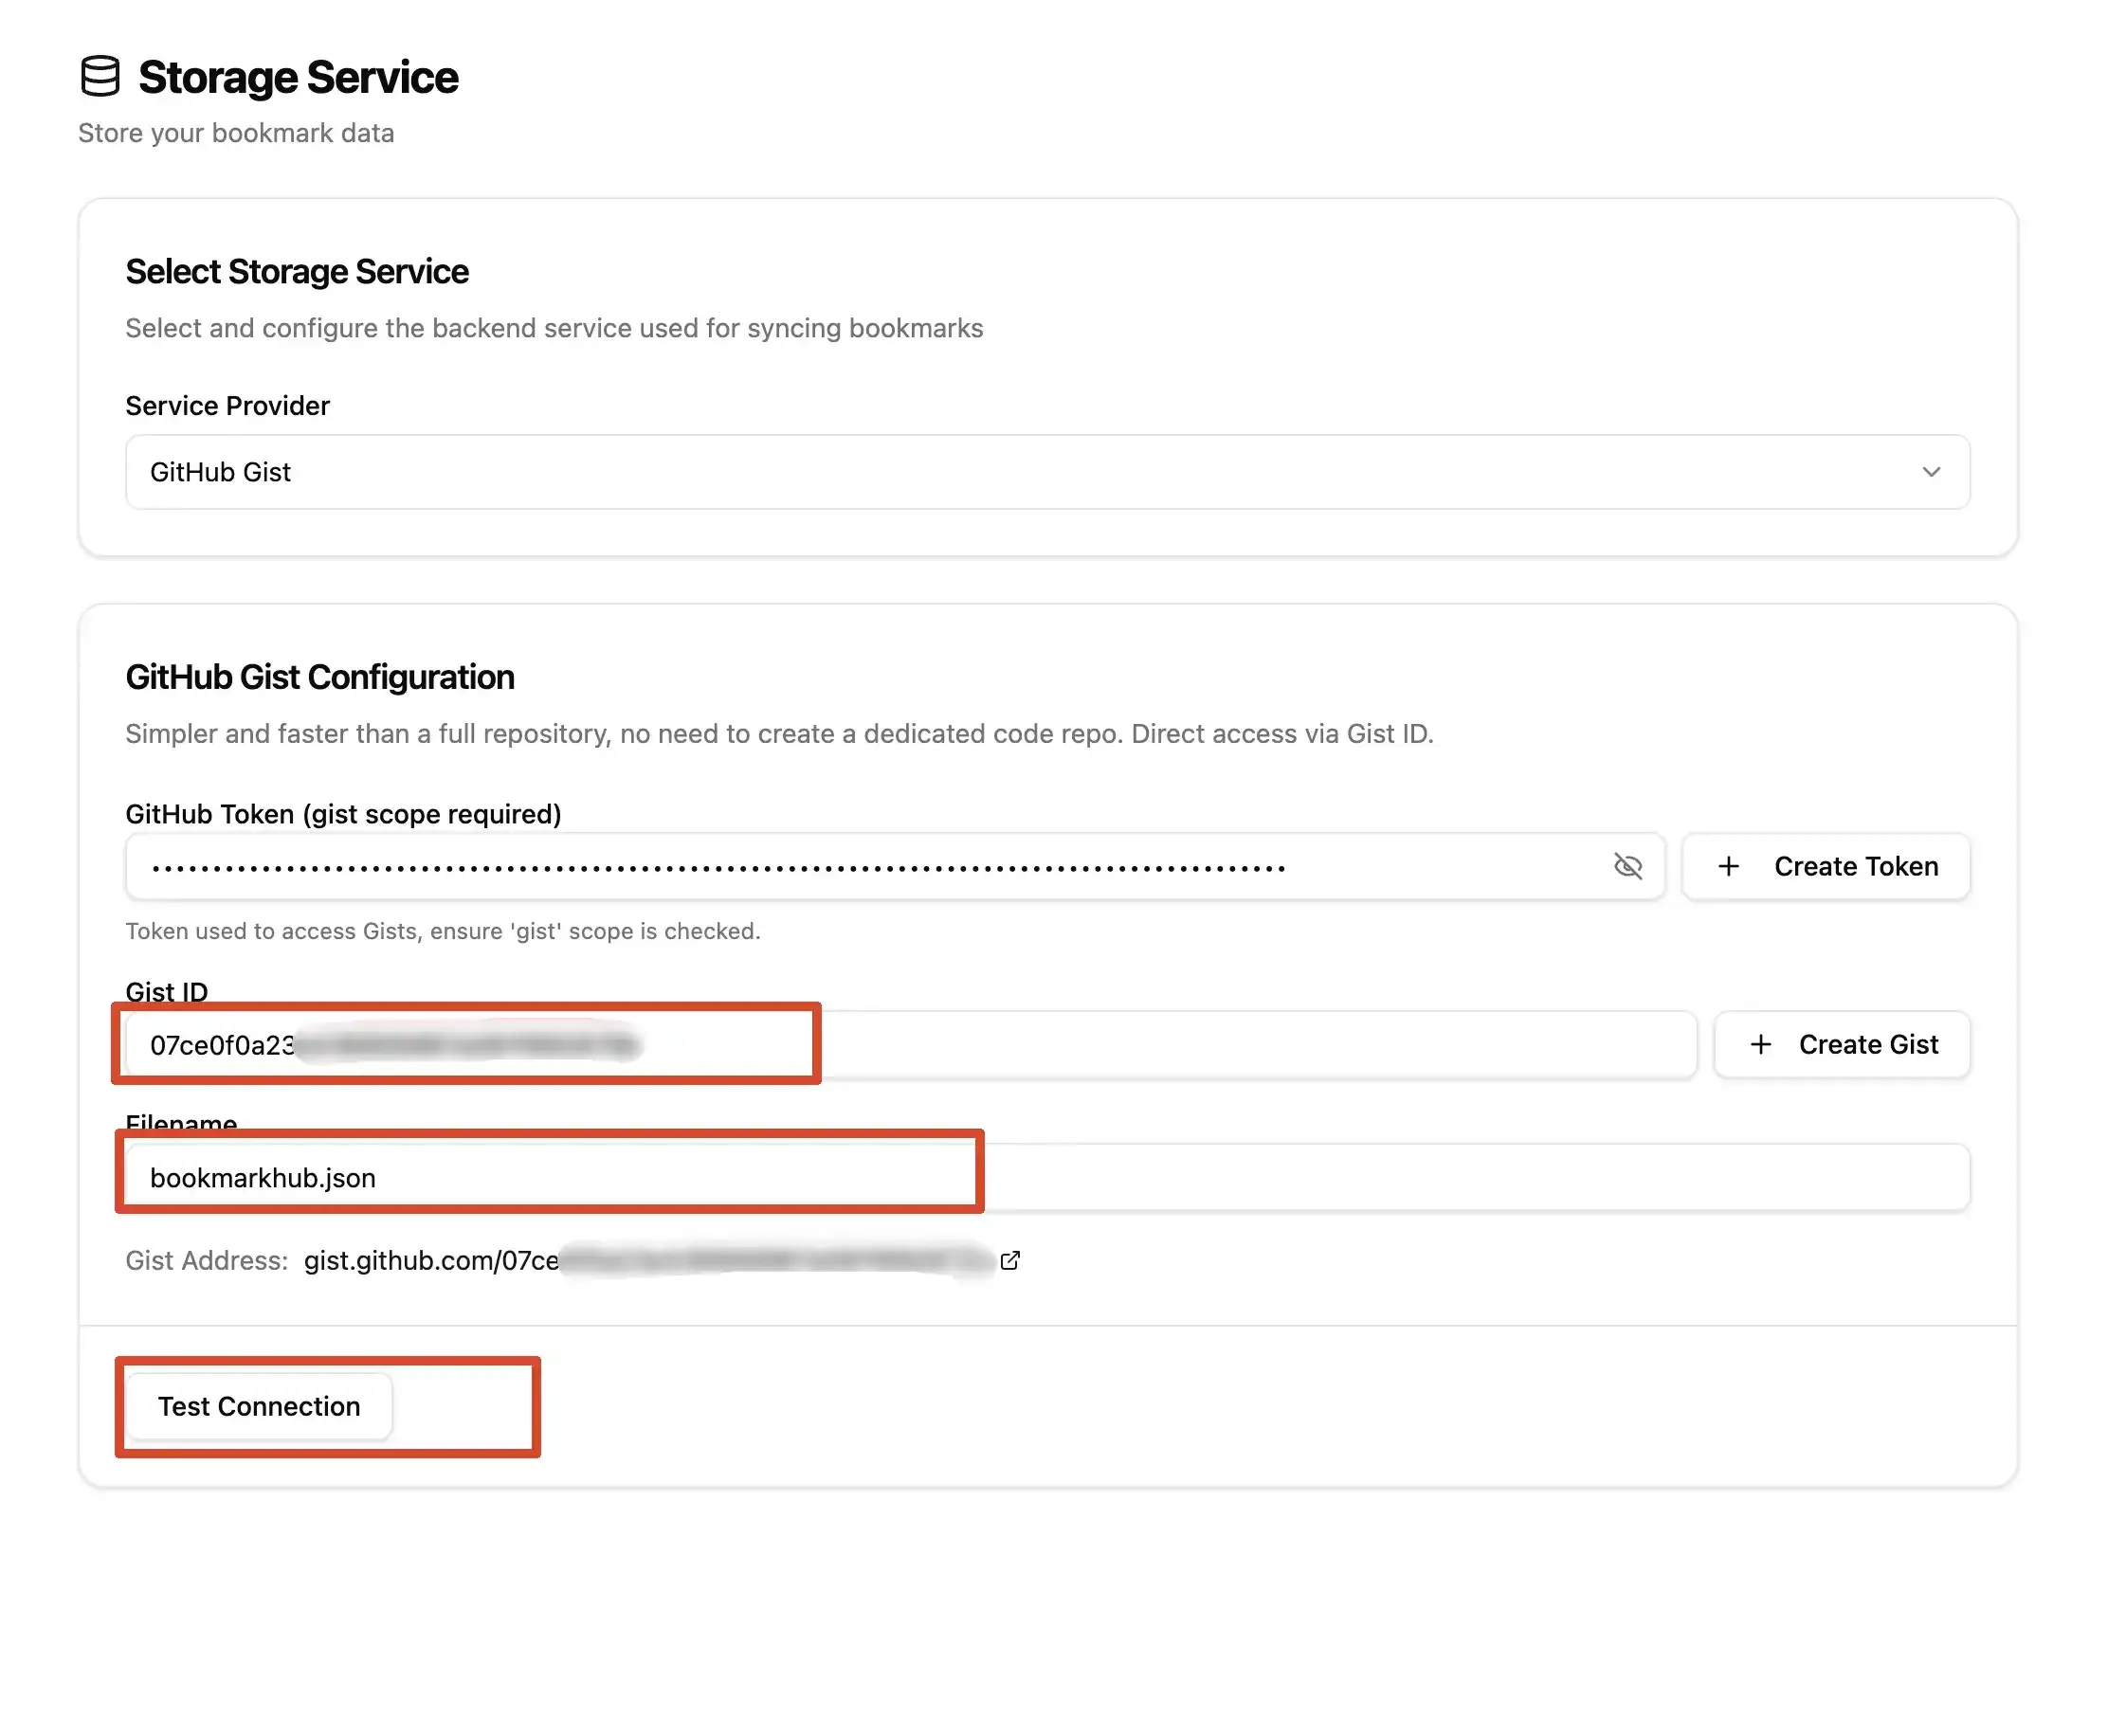
- Select “Storage Settings” from the left menu, then choose “GitHub Gist” as the storage method on the right.
- Configure Gist information:
- Click the “Create Token” button on the right; it will redirect you to the GitHub page to create a token.
- On the GitHub page, click the “Generate new token” button to create a new token.
- Copy the generated token into the Token input box in BookmarkHub.
- Click the “Create Gist ID” button on the right; it will automatically create a Gist and fill in the Gist ID.
- Enter a filename in the filename input box, for example:
bookmarkhub.json. - Click the “Test Connection” button. If the connection is successful, a “Gist connection test successful!” message will be displayed.
- Configuration complete. You can now perform your first sync.
2. Perform Your First Sync
Section titled “2. Perform Your First Sync”- Click the BookmarkHub icon in the top right corner of your browser to expand the main panel.
- Click the giant “Sync Now” button at the bottom.
- During the first sync, BookmarkHub will upload all your local bookmarks to your GitHub Gist.
- For subsequent devices, simply copy the Token, Gist ID, and Filename to the BookmarkHub extension on other computers and click sync to complete the synchronization!